
Take note….
I don’t know about you, but I have at least 3 seperate notebooks, that I carry around with me-one for random ideas about blog post, and to-do lists; one for my role as pre-school Committee Chair, and more to-do lists; and I am not really sure what the other one is for, but you can never have too many to-do lists….
And horror of horrors, my main one, where I scribble down anything that may at some point in the future be vaguely useful, as well as daily/hourly to-do lists (get up, get dressed, have breakfast, dress the Smalls-all the big important stuff…) has run out of space-arrrgghhhh!
Now, in the ‘normal world’ I would hot-foot it to the supermarket or local shop and buy a new one. In the ‘Pre-Small, Pre-My Make Do and Mend Year’ world, I might even have hot footed it the nearest Paperchase, and spend about an hour browsing the lovely stationery and stroking the notebooks before making a purchase (am I the only one who finds stationery a little bit addictive..?) In the sensible ‘Buy Nothing New’ world, I would scout around the car boots and charity shops until I found one. BUT this is me. And I am more than a little bit impatient. And despite knowing that my notebook has been about to run out for some time, I have failed to start scouting said second-hand retail outlets, so now I need a new notebook and I need one NOW.
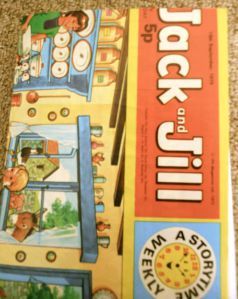
So I made one. From an old cereal box and some scrap paper 🙂 Check it out… (if you are a professional book-binder, you may want to look away now..)
This is what you need:

- an old cereal box (or some A4 card)
- a magazine/fabric/something nice to cover it with, that will bring joy to your heart…
- glue-PVA will do the job very nicely, and a brush/spreader
- A4 paper-I used some stuff that I had printed out before realising it was wrong (v.frustrating) so my notebook will only be one-sided
- ruler
- pencil
- a drawing pin
- needle and thread
This is what you do:
- Cut out a nice neat rectangle from your cereal box-I cut it out roughly with scissors and then neatened it off with a guillotine
- Glue your chosen decoration on to the front-smoothing it down to get rid of any creases and air bubbles. Leave to dry.
- Assume that your cereal box is A4 and fold your A4 pages in half, then realise that annoyingly, your cereal box is slightly smaller than A4, so discard this paper to use another time, and trim some more paper to size (actually, make it a little bit less wide than your cover, if you want to avoid some Wonk)
- Fold your paper in half, and use your ruler as one of those fancy bone folder things, and on it’s edge run it down your fold to squash it down well. I did 5 sheets at a time
- Line up your wodges of sheets (5 sheets per wodge) and use your ruler and pencil to make three marks on the fold line, at some regular-ish intervals

- Then take your drawing pin and punch a hole through the fold at each of the marked points

- By now, your cover should be dry-ish. Fold it in half, and use your ruler to (carefully) squidge down the fold. Then mark in the same place as your paper was marked and punch holes with your pin
- Thread your needle with some reasonably robust thread (I think mine was that thicker thread you use for hemming jeans) and line up your sheet ‘wodges’ and your cover
- Then sew through the holes-I did a kind of figure of eight, so ended up with it sewn around twice, but I probably over-complicated matters by making 3 holes-it would be easier with just 2

Do you like the fact that this piece of scrap paper says “Quality Issues”?! The Gods of Wonk are clearly trying to tell me something…
- Tie your thread ends together neatly and you are done!

- I then squished mine under a weighty tome (Nigella Feast) for an hour, as it refused to stay shut

Hurray! One new notebook, and in less time than it would have taken me to negotiate the Smalls into the car and hot-foot it to the Supermarket. AND I got to re-use some paper 🙂
